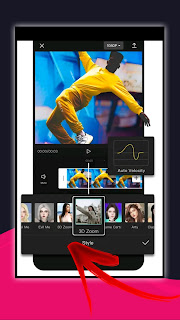
Capcut is a video editing and creation application that is available for both Android and iOS devices. It is a user-friendly app that allows you to create and edit videos with a variety of tools and features. In this guide, we will walk you through the steps for using Capcut to create and edit videos on your mobile device.
Before you begin, make sure that you have downloaded and installed the Capcut app on your device. You can download Capcut from the App Store or Google Play Store.
1.Opening a new project in Capcut
To start a new video project in Capcut, open the app and select the "New Project" button. This will open a new, blank project in the app's editor.
2.Importing media into Capcut
The next step is to import the media that you want to use in your video. To do this, select the "Import" button in the top menu. From here, you can choose to import media from your device's storage, from your social media accounts, or from the internet. You can also record a video or take a photo within the app using the camera icon.
Once you have selected the media you want to import, it will appear in the media library on the right side of the screen. You can then drag and drop the media into the timeline at the bottom of the screen to add it to your video project.
3.Arranging and trimming media in the timeline
The timeline in Capcut is where you will arrange and edit your media clips. To rearrange the order of your media clips, simply drag and drop them into the desired position in the timeline.
To trim a media clip, select the clip in the timeline and use the trim handles on either side of the clip to adjust its start and end points. You can also split a media clip by selecting the "Split" button in the top menu and then dragging the split line through the clip in the timeline.
4.Adding effects and overlays to media clips
Capcut offers a variety of tools and features for adding effects and overlays to your media clips. To access these tools, select the "Effects" button in the top menu. From here, you can choose from a variety of filters, transitions, and other effects to apply to your media clips.
You can also add text, stickers, and other overlays to your video using the "Text" and "Stickers" buttons in the top menu. Simply select the desired overlay and drag it into the timeline to add it to your video.
5.Adding music to your video
To add music to your video, select the "Music" button in the top menu. This will open the music library, where you can browse and select from a variety of music tracks to add to your video. You can adjust the volume of the music track and trim it to fit the length of your video using the controls in the timeline.
6.Exporting and sharing your video
When you are satisfied with your video, select the "Export" button in the top menu to save your video to your device or share it directly to social media. From the export screen, you can choose the desired resolution and format for your video, as well as select any additional options such as adding watermarks or trimming the video's length.
Once you have selected your export options, select the "Export" button to begin the export process. Your video will be saved to your device or shared to your chosen social media platform.
I hope this guide has been helpful in showing you how to use Capcut to create and edit videos on your mobile device. If you have


0 Comments